Nginx 설치
소스 다운로드
wget http://nginx.org/download/nginx-1.12.2.tar.gz
tar xvzf nginx-1.12.2.tar.gz
빌드
cd nginx-1.12.2 ./configure --prefix=/home/{user}/apps/nginx-1.12.2 --user={user} --group={user} --error-log-path=/home/{user}/logs/nginx/error.log --http-log-path=/home/{user}/logs/nginx/access.log --without-http_rewrite_module --without-http_scgi_module --without-http_uwsgi_module --without-http_fastcgi_module make make install- 옵션 설명
OS 사용자
-user: OS 사용자 계정. irteam을 권장한다.-group=irteam: OS 사용자의 그룹. irteam을 권장한다.
파일 경로
-prefix: Nginx 빌드 결과물이 들어갈 디렉토리-error-log-path: 에러 로그를 저장할 경로-http-log-path: 액세스 로그를 저장할 경로
모듈 선언
-without-http_scgi_module: http_scgi_module 모듈 제외-without-http_uwsgi_module: http_uwsgi 모듈 제외-without-http_fastcgi_module: fastcgi_module 모듈 제외-without-http_rewrite_module: http_rewrite_module 제외-with-http_ssl_module: HTTPS로 서비스하기 위한 모듈 추가-with-http_v2_module: HTTP/2로 서비스하기 위한 모듈 추가
그 외 다양한 옵션
https://www.nginx.com/resources/admin-guide/installing-nginx-open-source/
- 옵션 설명
- 트러블슈팅
빌드 시에 c 컴파일러가 필요하다. ubuntu에서 아래 명령어를 통해 gcc 컴파일러를 설치할 수 있다.
sudo apt install build-essential아래와 같은 오류로 zlib 라이브러리를 설치하라고 요구한다.
./configure: error: the HTTP gzip module requires the zlib library.
You can either disable the module by using --without-http_gzip_module
option, or install the zlib library into the system, or build the zlib library
statically from the source with nginx by using --with-zlib= option.
아래 방법으로 해결할 수 있다.
sudo apt-get install zlib1g-dev
실행
cd apps/nginx/sbin
./nginx # 시작
./nginx -s reload ## 설정 리로드
./nginx -s stop ## 종료
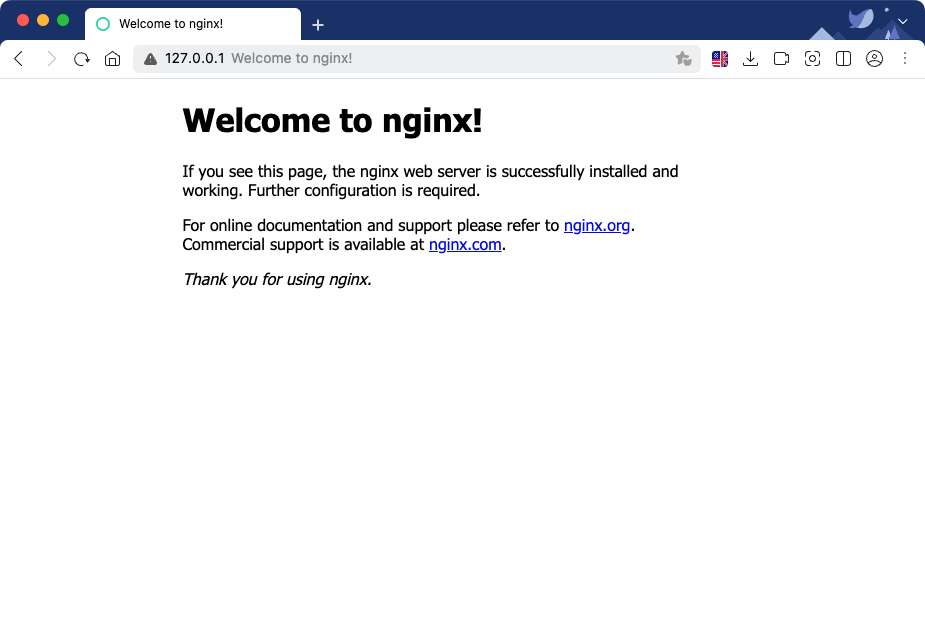
실행 결과 확인

HTTP/2 관련 모듈 설치
cd /home/{user}/download
wget https://www.openssl.org/source/openssl-1.0.2m.tar.gz
tar xvzf openssl-1.0.2m.tar.gz
./configure --with-http_ssl_module --with-http_v2_module --with-openssl=/home/{user}/download/openssl-1.0.2m --prefix=/home/{user}/apps/nginx-1.12.2 --user={user} --group={user} --without-http_scgi_module --without-http_uwsgi_module --without-http_fastcgi_moduleLog 삭제 스크립트 지정
주기적으로 로그 파일을 삭제해야된다.
shell 스크립트 형태로 실행
#!/bin/bash

# File date format
DATE=`/bin/date --date="1 days ago" +%Y%m%d`
# Archive period
DAYS=30
NGINX_PID_FILE=/home/{user}/apps/nginx/logs/nginx.pid
NGINX_LOG_DIR=/home/{user}/logs/nginx
NGINX_LOG_ARCHIVE_DIR=/home/{user}/logs/nginx
### Delete Nginx log ###
function rotate_nginx_log {
        mv $NGINX_LOG_DIR/access.log $NGINX_LOG_ARCHIVE_DIR/access.log.$DATE
        mv $NGINX_LOG_DIR/error.log $NGINX_LOG_ARCHIVE_DIR/error.log.$DATE
        kill -USR1 `cat $NGINX_PID_FILE`
        find $NGINX_LOG_ARCHIVE_DIR -mtime +$DAYS -name "access.log.*" -exec rm {} \;
        find $NGINX_LOG_ARCHIVE_DIR -mtime +$DAYS -name "error.log.*" -exec rm {} \;
}

### Main ###
rotate_nginx_log
crontab -e명령어를 통해 스크립트를 매일 실행0 0 * * * /home/{user}/scripts/rotatelog_nginx.sh
어플리케이션 서버 연동
Proxy 방식의 연동
Nginx가 Proxy 서버 역할로 사용자의 요청을 뒷단의 서버로 넘긴다. proxy에 대한 선언이 반복될수도 있으므로
proxy.conf와 같은 별도의 파일로 빼는 것이 좋다./nginx/conf/nginx.conf
http {
    # upstream으로 서버의 그룹을 지정할수 있다.
    # upstream의 이름은 proxy_pass 등의 선언에서 참조할 수 있다.
    upstream sevice-backend {
        server localhost:9001;
        # upstream 서버와 유지할 connection의 갯수를 keepalive로 설정한다.
        keepalive 100;
    }

    ...

    # 여러 path를 거쳐 서버에 들어오는 clinet ip를 얻어오기 위한 설정
    set_real_ip_from  127.0.0.1/32;
    real_ip_header    X-Forwarded-For;

    server {
        listen 80;
        location / {
            ...
            include proxy.conf;
            proxy_pass http://sevice-backend; # upstream 에 선언한 이름
        }
}
/nginx/conf/proxy.conf
proxy_set_header Host $host; proxy_set_header Connection ""; # keep-alive를 활용하기 위한 헤더 설정 proxy_set_header X-Forwarded-For $remote_addr; proxy_set_header X-Forwarded-Host $server_name; proxy_set_header X-Real-IP $remote_addr; proxy_set_header X-Forwarded-For $proxy_add_x_forwarded_for; proxy_set_header X-Forwarded-Proto $scheme; proxy_http_version 1.1; proxy_max_temp_file_size 0; proxy_redirect off; proxy_read_timeout 240s; proxy_buffering off; proxy_ignore_client_abort on;proxy_http_version: HTTP 프로토콜의 버전이다. 디폴트는 1.0 이다. keep-alive을 활용하기 위해서는 1.1로 명시해서 지정한다.proxy_buffering: upstream 서버로 부터 받은 응답을 버퍼링할지의 여부이다. 디폴트는on이다.off로 설정하면 Nginx는 뒷단의 서버로부터 받은 응답을 버퍼에 저장하지 않고 즉시 클라이언트에서 전송한다.proxy_max_temp_file_size: 응답이 버퍼 크기를 넘어 갔을 때 사용할 임시파일의 최대 크기다.proxy_buffering를on으로 지정했을 때만 이 속성이 의미가 있다. 디폴트는 값은 1024m이다. 0으로 설정하면 임시 파일을 사용하지 않는다.proxy_redirect: upstream 서버에서 받은 응답에서Location과Refresh헤더를 바꿀지의 여부이다. 디폴트 값은off이다.proxy_read_timeout: proxied server 로부터 응답을 읽는데 설정한 timeout 시간이다. 전체 응답 전송 timeout 시간이 아니라 두개의 연속적인 읽기 작업 사이의 timeout 시간이다. proxied server가 proxy_read_timeout에 지정한 시간안에 아무것도 전송하지 않으면 connection은 닫힌다. 디폴트 값은 60초이다.proxy_ignore_client_abort: 클라이언트가 연결을 닫았을 때 프록시 서버와의 연결도 닫을지를 결정한다. 디폴트값은off이다.
AJP 연동
/nginx/conf/nginx.conf
# ajp read timeout
ajp_read_timeout 600;

upstream sevice-backend {
    keepalive 512;
}

server {
    location / {
        ajp_keep_conn on;
        ajp_pass apiServer;
    }
}
HTTPS 설정
/nginx/conf/nginx.conf
server { listen 80; server_name service.naver.com; location /monitor/l7check { // 80포트로 L7 health check를 하고 있다면 301을 반환해서는 안된다. } location / { return 301 https://$server_name$request_uri; } } server { listen 443 ssl; ... # nginx 버전 1.15.0 부터는 ssl on 대신 listen 지시자 파라미터 ssl만 있으면 된다. ssl on; ssl_certificate {인증서 경로}; ssl_certificate_key {키 경로}; ssl_protocols TLSv1 TLSv1.1 TLSv1.2; ssl_prefer_server_ciphers on; ssl_ciphers ECDHE-ECDSA-AES256-GCM-SHA384:ECDHE-RSA-AES256-GCM-SHA384:ECDHE-ECDSA-CHACHA20-POLY1305:ECDHE-RSA-CHACHA20-POLY1305:ECDHE-ECDSA-AES128-GCM-SHA256:ECDHE-RSA-AES128-GCM-SHA256:ECDHE-ECDSA-AES256-SHA384:ECDHE-RSA-AES256-SHA384:ECDHE-ECDSA-AES128-SHA256:ECDHE-RSA-AES128-SHA256; .... }- ssl_protocols : 사용할 프로토콜을 지정한다.
- ssl_prefer_server_ciphers : SSLv3와 TLS 프로토콜을 사용할 때 서버에서 지정한 cipher의 cipher가 클라이언트의 cipher보다 우선시 될지의 여부이다. 디폴트는
off이다. - ssl_ciphers : 제공할 Cipher를 우선 순위에 따라 적는다.